Sunday, September 28, 2014

Breakfast Salsa Tacos - Leftovers Series

Usually when I make Carnitas Tacos from scratch there are leftovers. We threw a party for my father-in-law Bob on his 80th birthday this summer. There were 10 of us to feed and I cooked 2 whole pork shoulders (click here for my Pork Carnitas Recipe.) I also made homemade Pinto Beans and Mexican Rice. It was such a big hit, that all the Carnitas were eaten -- so no leftovers there.


To get the birthday party rolling I made 6 homemade salsas served with a big bowl of store-bought tortilla chips. Since the main entree, and the beans and rice, were made a day ahead, I wanted something fresh, so the salsas were made the day of the party with veggies, fruit and pungent dried (and rehydrated) chilis.


For my salsa party recipes, just click on any name listed here: Roasted Salsa Verde (tomatillo,) Red Chili (2 dried types - but same recipe,) Pico de Gallo, Mango, and Avocado Crema. I had a lot of salsa leftovers - mainly Mango, Roasted Salsa Verde and the 2 Red Chilis. Not that the guests didn't like the leftover ones, they raved about them, especially the Mango Salsa, I just made a lot.

So the easiest way I thought to use up the salsas was to make Breakfast Salsa Tacos. I combined two of my favorite Mexican Taco recipes, Scrambled Eggs with Refried Beans, and Mexican Chorizo and Eggs (click on the names to see the complete recipes.)


Homemade salsas are so delicious and will keep in the refrigerator for about 5 to 7 days. And the cooked salsas, Red Chili and Roasted Salsa Verde (tomatillo,) can be frozen for later use.


My homemade salsas add appetizing color and intense flavors. I also used Soy Chorizo that I get from my local 99 cent only Store. Corn tortillas, pinto beans and eggs are cheap too. It's quite impressive when you serve this colorful breakfast made from humble ingredients.


Using fresh made salsa is such a refreshing way to start the day. So read on as I take you step-by-step on my Breakfast Salsa Taco cooking journey.


Ingredients ( enough for 2-3 people)
  • 4 eggs - I used large eggs.
  • 3 to 4 tablespoons Mexican Chorizo - the soft kind. I used Soy Chorizo, okay to use beef or pork chorizo.
  • 3 tablespoon cooked pinto beans - homemade or from the can.
  • Corn tortillas - about 6 to 8. I used the small taquera or taco truck ones (measures 4 inches across.) Of course, okay to use regular larger ones. Also, you can use flour or wheat tortillas.
  • A few teaspoons of cooking oil, or leftover pork fat and broth from Carnitas - which I used.
  • No seasoning necessary as Chorizo and beans have plenty of salt - at least for me.

Directions
Get out the salsas to bring to room temperature, so they are ready to top your tacos.

In my original Chorizo and Eggs recipe listed above I cooked the two ingredients together. For this recipe I cooked the chorizo by itself, adding it to the Refried Beans and Eggs later.

I get things going by adding a teaspoon of oil (or leftover Carnitas broth/fat) in my frying pan, over a medium heat. I add the chorizo and cook and stir it until the liquid is cooked away the the chorizo is crumbly, but still a little moist - about 3 to 5 minutes.


Remove it from the pan when done and set aside. Add more oil if needed and spoon-in the 3 tablespoons of cooked pinto beans. Add a tablespoon of the liquid too. Use a fork and mash the pinto beans. You will form a chunky paste. Stir and heat beans through, about 3 minutes.


Now add the 4 eggs. I like to break the yokes and cook it a minute until the eggs start to set - without stirring. That way you get nice egg pieces and it's not all brown from over-stiring.

At this point see the paragraph below and start the tortillas heating up.

Once eggs are semi-cooked break it all apart and loosely stir it together. Just cook eggs until they are at your desired scramble doneness. About 3 to 5 minutes total.


(If you like your eggs well scrambled, so the white and yoke are blended, then mix eggs in a separate bowl, add them to refried beans. I would still let the eggs set for a minute, then start slowly mixing it all together.)


Once the eggs have cooked for a minute, that's when you start the tortillas heating up. I add a little pork fat or oil to a grill or frying pan and start heating the tortillas over a medium heat. If the tortillas cook too fast, then just drop the heat to low and stack the tortillas and flip them, from time-to-time, until eggs are done.


You can heat the torilllas a little or char them, it's up to you. It takes just 30 seconds, to a minute, for each side to heat through. It's okay to cook all the tortillas ahead and wrap them in a paper towel (to keep warm) and place them on a plate. You can even give them a 20 second microwave to reheat them when the eggs are done.


When the eggs are almost done, I move them to one side of the pan and add the cooked chorizo to heat it up, too. Cook eggs until desired doneness. You could also microwave cooked chorizo for 15 to 30 seconds, if your pan is too small.


That's it, now you just assemble the Breakfast Salsa Tacos by adding some eggs and chorizo to the warm corn tortilla and top with any salsa, or combination of salsas.


Hindsight
It's easy tweak the the main ingredients to balance the tacos your way. Do you like a lot of egg and no chorizo? How about mainly chorizo and refried beans? It's all good. Just break an extra egg or two, or add another scoop of chorizo and refried beans.

It's best to keep leftover salsa in the refrigerator until you get to cooking. Bring the salsas to room temperature before serving.

You can use a favorite cooking oil instead of leftover Carnitas broth/fat (if you are making these Breakfast Salsa Tacos from scratch.) And, of course, you can use your preferred jarred salsa, too.

Monday, September 22, 2014

Spicy Thai Basil Chicken - Deal of the Day

This Deal of the Day will leave your taste buds spinning. It's one pungent bowl of noodles, both sweet and spicy and loaded with flavor. Spicy Thai Basil Chicken by Thai Kitchen is a very good 99c only Store find.


A big plus are the large cubes of white meat chicken. I pulled apart the chicken to to make sure it is not a solid processed cube - the meat seemed real enough as I detected strands chicken meat. And you get a lot of chicken meat for a 99.99 cent frozen meal.


If you like the classic Pad Thai entree, then you will like these rice noodles, too. I like the light and airy consistency of rice noodles. And the noodles are not mushy like typical Italian pasta frozen dinners.


But you want to give the noodles and sauce a stir when defrosted enough; this will help steam all the noodles to an even tenderness and cut down on typical microwave cold and hot spots. I don't know why they are still slightly chewy, the way I like them. Maybe it's just that rice noodles hold up better when frozen, than Italian flour noodles?


A couple ingredients make this a pungent meal, first there is chopped garlic on top and visible red Thai chili pieces throughout. At first glance when defrosted, I thought the small sprinkles-looking topping was peanuts. Nope, just garlic pieces that flavor but, fortunately, not overpower.

You will also find pieces of Thai basil, although not much of that herb. This frozen meal is not for the faint of pallet as the red chili flakes are very spicy, and I like it that way.

But one word of warning, to quote my gym-rat workmate when he read the "Nutrition Facts:" Dude, that's a crazy amount of salt in there." Yep, the sodium amount is 710mg, or 30% of the recommended daily total!

I try to keep my sodium intake low, no processed chips or crackers, except on occasion. And if I am cooking with processed foods, then I leave out seasoning with salt. I try to balance it all out - some days are salty and some aren't.


Thai Kitchen has a list of other frozen entrees including: Pad That, Green Curry Chicken and a Veggie Red Curry. All sound good to me, and if they show up cheaply, I would definitely try them all.


At 10 ounces you get a lot for your buck. So, other than too much salt and if you can take the spicy heat, I give Spicy Thai Basil Chicken by Thai Kitchen, on a scale of 1 to 9, 9 being best......I give this delicious Deal of the Day an 8 !


Tuesday, September 16, 2014

Baked Eggs Forentine

Luxuriate after a long workweek with The 99 Cent Chef's luscious Baked Eggs Forentine. Go ahead, you deserve it. It's the most delicious edible bonus, a rich-tasting creamy spinach sauce crowned with a soft cooked egg. The name makes it sound haute, but it's not.


All you do to make the sauce is saute some onion, add the spinach to wilt, then pour in some milk, and finally, thicken with a little flour and dried parmesan. Or, you can substitute the parmesan with any favorite cheese you have on hand, even cream cheese. Just blend it in when the spinach sauce is warmed through.


I added the spinach sauce to a small ceramic ramekin and topped it with an egg. You want to bake it at 375 degrees about 20 minutes, until the whites of the egg have set. If you want the yoke slightly cooked through, then the cooking time will be about 25 minutes total.


It's certainly economical, especially when you take home a meager paycheck. Eggs, spinach, onion, milk and dried parmesan - check. Yeah, they're all cheap and I get the ingredients at my local 99c only Store and Latin grocery store.


I used fresh spinach from the bag. You could use one bunch of fresh spinach, or a small package of defrosted and drained frozen spinach.With a bunch of spinach from the produce section of your local market, just make sure cut off the long stems and wash the leaves.

My Baked Eggs Florentine is a great way to start the weekend, along with a hot cup of coffee and pleasant company.


 Ingredients (2 servings)
  • 2 eggs
  • 4 cups of spinach leaves - I lightly pressed them into a measuring cup. Okay to use a small package of defrosted frozen spinach, drained. A bag of spinach is easy to use.
  • 1/2 cup of milk - any type, 2% or whole milk. Okay to use half and half cream, for a richer sauce.
  • 1/4 chopped onion - white or yellow onion.
  • 1/4 teaspoon of nutmeg - optional. I've made it without and it tastes fine.
  • 1 tablespoon of dried parmesan - okay to use any cheese you have on hand. About a 1/4 cup shredded.
  • 1 teaspoon flour
  • 1 teaspoon cooking oil - for sauteing onion and spinach.
  • Black pepper to taste - I find dried parmesan has plenty of salt.
  • 2 ceramic ramekins - for baking.

Directions
Add 1/4 of a chopped onion to a medium hot pan with a teaspoon of oil. Saute onion for a couple of minutes until softened.


Add 4 cups of fresh spinach to sauteed onion and cook and stir until wilted. The spinach will quickly shrink and soften after a couple of minutes.


Sprinkle on a teaspoon of flour and mix well. Pour in half cup of milk or cream. Heated through for a couple of minutes then sprinkle on dried parmesan.


Finally add 1/4 teaspoon of nutmeg (optional) and a little black pepper to taste.


Get the oven heating to 375 degrees. Add spinach sauce to the ramekins. I fill them no more than half way, as the sauce will rise and bubble. Top each ramekin with an egg. You can sprinkle on a little salt and pepper if you want. It's a good idea to put a wide pan underneath the ramekins, in case some of the spinach sauce overflows.


I guess this is the trickiest part is: how well done do you like your egg? I like my egg yokes runny so for a 375 degree oven it takes about 20 minutes. For a yoke that is still just barely soft, then the time will be closer to 25 minutes.

You will know by checking that the eggs white is cooked solid. And if the yoke has a little give when pressed with your fingertip.


Of course, be careful when you are handling an oven-hot ceramic ramekin.

You might want to wait a minute for cooling, when serving right out of the oven. The spinach sauce will be hot like the ramekin, so eat carefully and enjoy. For serving to kids, then allow it all to cool down longer.

Wednesday, September 10, 2014

Veggie Pasta Salad

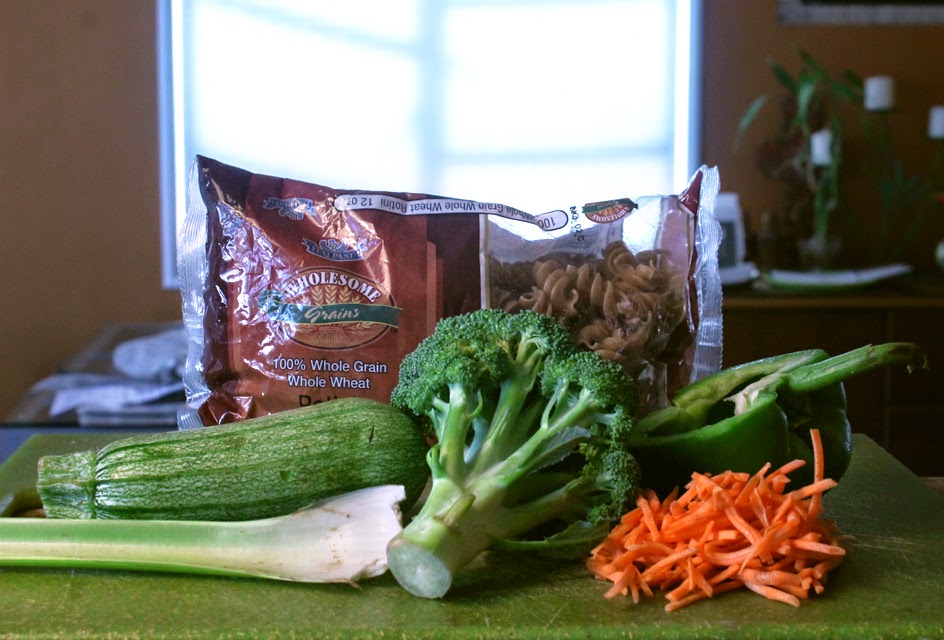
My pasta salad is made cheaply with veggies found at my local Latin grocery and supplemented by pasta from the 99c only Store - it's the best of both worlds.


Green bell peppers are cheaper than red and yellow ones, so that's what I usually get. Mexican squash is cheaper than yellow squash. Broccoli is frequently on sale and celery is cheap everywhere.


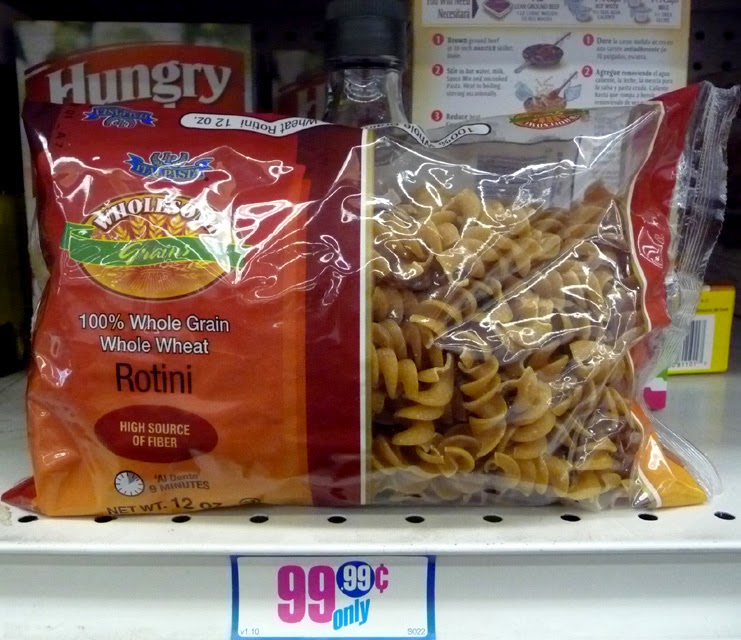
Just because I'm a cheap$kate, doesn't mean I have to eat unhealthy. I've gotten gluten free and whole wheat pasta from my local 99c only Store. It's not always there, but when it is I get a few packages. I like the flavor and it's good to mix it up, instead of always cooking with regular white flour pasta.


When making a Veggie Pasta Salad, you want to taste the veggies raw, just to see if you like it that way. If not then try blanching them in boiling water for a minute or two. This takes out the harshness, and leaves a more mellow and subtle flavor. It also removes any slight bitterness you may detect. But I find most veggies are delish even raw - once you've tried it that way a few times.


Broccoli, squash, asparagus, corn, green beans and cauliflower do well with a quick blanching. Carrots, onions, celery, cucumber, and tomato are easily eaten raw. As for the amount, you can adjust to your veggie preference.


Veggie Pasta Salad can be made with almost any vegetables you find on sale. As for the salad dressing I like to use vinegar and olive oil, although you can use any store-bought salad dressing you like. It's really simple and quick to make one. While the pasta boils, just chop the veggies. (And I usually blanch some selected veggies first and use that water to boil the pasta in - hey, it's extra flavor.)


And if you don't want to deal with chopping a bunch of veggies, just get a favorite frozen package medley like Italian, Oriental, or combine a couple of packages.


My Veggie Pasta Salad is even better the next day and makes a great meal to pack for the workweek. So give it a go, and let me know what veggies you add.

Ingredients (4-6 servings)
  • 1 package of pasta - about 1 pound. I like bow tie, spiral, macaroni or any short-cut type.
  • 1/2 bell pepper - chopped
  • 1 squash - Cut into cubes. I used Mexican squash, but easy-to-find zucchini or yellow neck squash will do.
  • 1/2 cup of carrot - thin sliced or julienned.
  • 1 medium head of broccoli - about 1 cup when broken apart.
  • 1 stalk of celery - chopped.
  • Water - to boil pasta and blanch some of the veggies.
  • 1 Tablespoon of salt - for boiling pasta.
  • Ice cubes - to cool down the cooked veggies. Or just run cold water on them for 10-15 seconds to slow down the cooking process (after blanching.)


Pasta Dressing
  • 1/4 cup of olive oil - or any favorite tasting oil.
  • 1/4 of vinegar - any type you like. I've used apple cider, rice, red wine or plain white vinegar.
*You could also use a favorite store-bought salad dressing.

Directions
Rinse off the veggies. Most just need some chopping and peeling. It's not too much prep, really.

Cut off tough and dried-out end of celery root. I peel off some of the celery treads off the rough side. You can use a potato peeler, or just take a knife and peel away some of the strings (you don't have to get them all.)


For bell pepper, slice it in half, from stem to bottom. Remove the seeds and white membrane from the inside of the bell pepper. Chop it into small pieces. For this recipe I used half a bell pepper because I find the flavor very intense.


I like to blanch some of  the veggies first. Slice Mexican squash in half, lengthways. Chop off tough stalk end and peel some of the broccoli stem, this will help tenderize the stalk when blanching.


When a pot of water comes to a boil then add the squash and broccoli. I usually cook the veggies about 1 to 2 minutes - just enough to slightly soften them. You don't want to overcook them until they get mushy. I think it's better to slightly undercook so there is some crunch left.


Remove the broccoli and squash to a bowl of cold water with ice cubes to stop the cooking. Or put the hot veggies in a colander and run cold water over them for 15 seconds or so.

Now I add salt to the water and cook the pasta according to the package directions.


While the pasta cooks, and once the broccoli is cooled, I break off the florets and chop the stem into smaller pieces. I also chop the Mexican squash into bite-sizes.

When the pasta is done, drain and run cold water on it to stop the pasta from over-cooking.

Now time to bring it all together. Add the pasta to a large bowl, along with all the veggies.


Pour in the vinegar and oil. Mix the salad well. You can add or subtract the dressing amount to suit your taste. Finally sprinkle on some salt and pepper (optional.)


Keep the Veggie Pasta Salad in the refrigerator until you are ready to serve.

You can make this salad with any fresh veggies you like, I sometimes add cherry tomatoes, too. The amount of each veggie can be adjusted to your preference - if you like a lot of broccoli, then add more. If bell pepper is too pungent, then leave it out. Use this recipe and make it to suit your taste buds and pocketbook.


Related Posts Plugin for WordPress, Blogger...