Standing before the Brandenburg Gate, West Berlin, in 1987, President Reagan exclaimed: “
Mr. Gorbachev, tear down this wall." He was referring to the Communist-built
barrier separating East and West Berlin, a bitter symbol of the Cold War.
This month President Obama trumps Reagan by crossing into enemy territory to tear down our own misguided economic wall around our island neighbor. On Obama's second day of
a historic visit to Cuba, in a speech addressed to the Cuban people, he declared: "I am here to bury the last remnants of the Cold War in the Americas."
And now The 99 Cent Chef is ending the Cuban embargo, culinarily that is. So in support of President Obama's latest
diplomatic coup d'état, I offer up a tasty slate of Cuban-style recipes as a yummy peacetime dividend.
The 99 Cent Chef welcomes all nations into his kitchen anytime. I wish I could really end this
embargo on Cuba with a wave of my whisk. Let's move on Congress, this Cold War policy fiasco is so last century -- it's over!
Just let the Republican politicians of Cuban descent, embargo supporting
Marco Rubio and
Senator Ted Cruz, stew in their own juices and eat crow, as President Obama continues spreading goodwill, and mending fences, to our Latin neighbors.
So let's start with one of my favorite sandwiches, a
Cuban Sandwich.
I would like to break bread with the Cuban people one day, as I am a great fan of their cuisine. Locally I've had both good and bad
Cuban Sandwiches. Downtown's former
Cuidad (now a
Border Grill ) served a great mini-version at Happy Hour to downtown power brokers in suits and skirts. At Glendale's
Porto's Bakery on Brand Boulevard, nearby mall shoppers get a bargain sandwich deliciously meaty, and cheap at $4.85 (but they add mayo, which is a no-no.) At
Cafe Tropical on Sunset Boulevard, Echo Park hipsters hunkered over their Macs, can scarf down $6 sandwiches while sipping papaya juice under Che Guevera posters.
West on Sunset in Silverlake, taxi drivers dine mini-mall style at
El Cochinito on $6.95 sandwiches. And my favorite Cuban Restaurant,
Versailles , with locations on Venice and La Cienega Boulevards, serves a surprisingly
unappetizing one for $9.99 - oily bread, ham, and Swiss cheese, with scraps of roast pork. Maybe it was just a bad day in the kitchen the one and only time I tried it - I'll give it another chance someday. Sorry,
Versailles - I'll always come back for your
Roast Pork and
Chicken dinners, though.
The
Cuban Sandwiches is a dynamite combination of flavors: sour mustard and pickle, tart creamy Swiss cheese, sweet cured ham, and tender Cuban roast pork - all on a crunchy crusted grilled bread roll.
When placed on your plate it is a sleek modernist meal. The sandwich is pressed thin and sliced diagonally -- looking like a crisp, cheesy, meat-filled shark fin, with a slash of cool green pickle peeking out. It's a great tasting sandwich that's also aesthetically pleasing.
Skip ahead to get my recipe of
Cuban Roast Pork the most complicated part of the sandwich. The other fillings come cheaply from a typical deli case. And you now have one more use for that leftover Easter ham.
As for the bread, Cuban rolls are not easy to come by, but a sandwich roll, from the bakery section of your grocery store, works fine. I've picked them up for way less than 50 cents each. You could use an Italian or French baguette - just slice it into 2 or 3 sections.
My local Latin market makes fresh
Bolillos rolls daily. I've even used packaged steak rolls. Once you grill the sandwich, the bread crisps-up well enough. And since this is a pressed sandwich, the shape and texture of the bread is changed significantly.
A
Cuban Sandwiches is similar to an
Italian Panini - toasted crisp with meat and cheese. It is Cuban comfort food at its finest. This is the concluding Cuban dish in my month-long series, so give it a go.
And the perfect drink accompaniment is a cool Cuban concoction, made with rum, sugar cane juice, and lime, called a Mojito. As a special bonus, I've called up one of my first recipe videos, "
The 99 Cent Mojito," for a timely replay. To see the blog post with my Mojito recipe written out, just
click here.
The 99 Cent Mojito -Video
Play it here. The video is 4 1/2 minutes.
Ingredients for Cuban Sandwich (one sandwich)
- Cuban style roast pork - a few chunks or slices. Click here for my recipe.
- 1-2 slices of cooked ham - depending on how thin the ham is.
- 1-2 slices of Swiss cheese - again, depending on how thin cheese is sliced.
- A few slices of pickle - wedges or coin sliced. Usually made with tart, but sweet Bread and Butter is a nice twist.
- Cuban bread roll, split - or any roll. I've used steak rolls, French, Italian, and Mexican (bolillos) bread rolls.
- Mustard or dijon - a smear on each roll side. Some use mustard as a dipping sauce only. It will be good cooked with or without mustard.
- A pat of butter or a teaspoon of oil for grilling. Non-stick spray is okay.
Directions
Remove meat from refrigerator and allow to reach room temperature, about 5 minutes. Add butter (or oil) to a heating pan or grill. Split roll and smear mustard on each side. Layer on pickles, chunks of roast pork, ham and cheese, and place on a heated grill or pan. Brown bread on each side, until cheese is melted and oozing.
If the pork and ham is thick-sliced you can zap it in the microwave 20 or 30 seconds to heat it through. You can also heat the meat in a pan for a minute. You want the meat to be hot in the sandwich when served.
This sandwich looks uniquely thin because it is pressed while cooking. Some cooks place everything from a cast iron pan to a foil-wrapped brick on the sandwich. I just used my large metal spatula (or any spatula, really) and pressed the sandwich during cooking. It gets thin enough. Also, you could cook it in a Panini press -- or heck, even on a dorm room George Forman Grill !
A
Cuban Sandwich is served sliced at an angle -- so one sliced side tapers into a point. It's easier to inhale that way. Serve with my
99 Cent Mojito!
It's always a savory conundrum - do I order
Lechon Asado (roast pork) or
Pollo Asado (roast chicken) when I dine at a
local Cuban restaurant.
Usually what happens is my wife orders the chicken and I get the pork,
so we just share. And now, I'm happy to share another Cuban classic with my readers - the luscious and pleasing pork entree,
Lechon Asado.
Cuban Roast Pork holds the exalted culinary status of Southern
BBQ Pulled Pork, grilled Mexican
Al Pastor, or baked
Kahlua Pig from Hawaii.
It's
slow-cooked with a marinade of sour oranges, garlic, and oregano. Since sour oranges are hard to come by, unless you live in Miami, I combine regular orange and lime juice. In all, it's a killer citrus and garlic combination that makes slow-cooked pork butt (or shoulder) sweet,
caramelized, fragrant, and fall-off-the-bone tender.
Ingredients for my
Cuban Roast Pork recipe are budget-priced at any market. I get pork shoulder on sale for about 99 cents a pound at
my local Latin market, and the other fruit, veggies, and herbs are cheap anytime.
A classic Cuban meal involves
Black Beans and
White Rice. Read on for a quick
Black Beans recipe. Everyone has made white rice (you can use generic quick-cooking.) I also did a favorite Cuban side of steamed
Yucca a couple of years ago. For an extra rich sweet side try my
Fried Plantains recipe that's described next. A healthier and less starchy way to go is to accompany roast pork with my
Cuban Salad at the end of my Cuban themed blog post.
Cuban Roast Pork is the kind of dish you start baking after breakfast, so it's ready for dinner. And since a large cut of meat is used, you will have plenty of leftovers for a couple of
Cuban Sandwiches.
Ingredients
- 6-8 pounds of pork - shoulder or butt, with or without bone. Boneless cooks faster, but is more expensive.
Marinade
- 2 cups of orange juice - or fresh squeezed (about 6 oranges)
- 1 cup of lime or lemon juice - from a bottle or fresh (about 2-3 whole lemons or limes)
- 2 tablespoons garlic - chopped fresh, or from the jar.
- 1 tablespoon of oregano - dried or fresh
- Salt and pepper to taste
Directions
Take
large pork shoulder and pierce deeply all over with a knife, so it will absorb the marinade. In a large bowl, mix together orange and lime juice,
chopped onion, garlic, and oregano. Place pork in a large pan, ceramic or plastic bowl or a large Ziploc bag . Pour marinade over pork and season with salt and pepper. Cover with lid or foil.
Store
in the refrigerator a couple of hours or overnight. Turn pork a couple of times to make sure marinade is evenly distributed over the meat.
Later,
place pork, still covered or foil-covered, in a 350-degree oven. Leave the bottom of pork exposed to water, to keep the pork moist, during long baking time.

Bake
5 - 6 hours. Baste with marinade, from the bottom of pan, every hour -
cover and continue baking. After a couple of hours, you may need to add water, a cup at a time, as liquid cooks out.
Check
tenderness of pork at about 5 hours. Done when pork easily separates with a fork. Cook another hour or two if not tender enough. Cooking time may vary, depending on the size of the pork roast.
I've
even cooked it for 8 hours for a large pork shoulder with bone. Just make sure there is water or broth in the roasting pan to keep the pork from drying out. And keep it loosely covered in foil.
To
serve, break off large chunks of pork and arrange on a plate with white rice and black beans (or salad and sides mentioned earlier). To have a
total Cuban dinner experience, pour over roast pork my easy-to-make
Mojo Criollo Sauce with sliced onion (
click here for the recipe).
Black is beautiful for the sweetest Fried Plantains. Green is the color for nutty, potato-like
Tostones. When shopping for plantains keep this in mind.
For my continuation of all things
Cubano, I'll show you how to prepare both
Fried Plantains and fried
Tostones. It's an easy and quick dish to make; the only hard part is finding plantains. I go to
my local Latin market where they sell for about 50 cents a pound, just the right price for this
El Tightwad Cuisiner. Since the majority of the Los Angeles populace is Latino, I find that plantains are carried in almost every large supermarket.
Maybe
you've accidentally bought one thinking it was a regular banana? If you bite into a peeled one, you will get a mouthful of bitterness, but fry up a batch and you will be surprised how mild and sweet it is.
Like
French fries, plantains are cooked in oil until brown. You do have to watch the ripened black plantains closely when cooking -- because of the high sugar content they can burn.
Tostones don't have that, so they brown more slowly. Plantains are quite large, and just one makes enough for a couple of servings.
If you want a sweet
Fried Plantain,
buy it almost totally black. It is not rotten, just super sweet. If you get it yellow, you'll have to wait a few weeks to get the desired ripeness. In the photo, my plantain was not totally black, so the result was fine, but it could have been sweeter. For
Tostones, green is best, but I've used yellow, too.
This is a perfect side for my
Cuban Style Roast Pork. And
Tostones double as
tasty canapes that can be served like tortilla chips or crackers at a party.
Ingredients (each plantain serves 2)
- 1 green plantain
- 1 black plantain
- 1/2 to 3/4 cup of vegetable oil for frying.
- Salt and pepper to taste (optional).
Directions for Fried Black Plantains
Add
oil to a medium-sized pan or pot. You don't need the temperature to be as hot as you would for making French fries, but go with a low/medium temperature, so you can easily watch that the banana slices don't burn.
A
plantain doesn't peel quite as easily as a regular banana - there's a
bit of technique involved. While oil is heating up, chop off the banana ends and slice into the peel lengthwise from end to end. Go just deep enough to hit banana flesh. It may be easier if you first slice the banana in half. The skin should peel right off.
Next,
slice the banana at an angle so you get about three-inch-long pieces that are about one inch thick. I've also had them sliced small like a
typical banana, and that's fine too. Add slices to the pan with oil and fry about 5 minutes on each side.
Go
for a dark brown color. You will need to watch closely toward the end,
as brown can turn to black quickly. Drain on a paper towel and serve warm.
Directions for Tostones (green or yellow plantain)
Heat
oil the same as above. I managed to cook both of these plantains in a
1/2 cup of oil. Chop off plantain ends, slice into skin lengthwise from top to bottom, and peel. Green plantains are a little trickier to peel.
Sometimes the inner peel will stick to the flesh, so just scrape it off.
I
use a "two times" frying method. Cut plantains like you would a normal banana; there's no need to cut at an angle, but do cut them at least an inch thick. Add plantain slices to hot oil and lightly brown, about 2
minutes each side. You are getting the plantains to soften for pressing -
the next step.
Take
out cooked plantains and allow to cool for a minute. Arrange plantain coins on a plate or cutting board. I used the bottom of a drinking glass to press each fried plantain. You don't need to squish completely flat,
just enough to burst the slices, so the flesh will finish cooking completely.
Next add pressed slices back into the oil for a quick 3-minute fry (or until medium brown), on each side. Serve
hot or at room temperature.
I first tried Cuban food at the venerable
Versailles Restaurant on Venice Blvd. I love the place for its
Roast Chicken and
Roast Pork.
I think everyone in L.A. has eaten there at least once. And the price
is right, just over $12 for dinner, which includes black beans, white
rice, fried plantains with a basket of delicious Cuban bread.
Now,
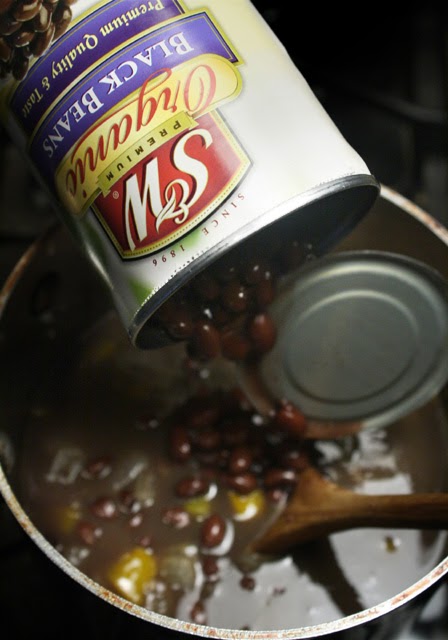
the bedrock to any Cuban dining experience is black beans and white rice. White rice is simple enough - I have no special technique - just follow package directions. But I do have a few tricks to up the flavor profile for canned black beans (or any canned beans you may favor).
All
you have to do is saute a little onion, bell pepper, garlic, 1/2 teaspoon of vinegar, and sprinkle in some oregano. Mix it into a small pot of black beans and cook for 10 - 15 minutes. It's so simple but makes a
lot of difference.
When
I roast a hunk of pork, I'll put on a pot of black beans made from scratch (my recipe in under
Hindsight below,) since they are both slow cooking. But most of the time I go with convenience and
just use pre-cooked black beans.
So next time you get a cheap can of beans, try out my delicious veggie additions for extra flavor to make boring canned beans into something savory. And be sure to check back for more
Cubano recipes!
Ingredients
- 1 can of black beans
- 1/4 small onion
- 1/4 of bell pepper - any color.
- 1 teaspoon of chopped garlic - fresh or from a jar.
- 1/2 teaspoon vinegar - any type you have on hand like white, apple, or rice vinegar.
- 1 tablespoon of oil - vegetable or olive oil.
- Pinch of oregano - fresh or dried (optional).
- Pinch of pepper - canned beans have enough salt for my taste.
Directions
In
a pot over medium heat, add oil and saute onion and bell pepper until soft, about 5 - 10 minutes. Next, add chopped garlic and cook a couple of minutes.
Next, add a can of black beans and a teaspoon of vinegar. Turn up the heat until beans start boiling, then reduce. Cook on low heat, uncovered, for 10-15 minutes, stirring occasionally. The sauce will reduce and thicken.
Cuban beans are typically served with white rice.
This recipe also works well with canned red, white, and pinto beans, and with black-eyed peas.
Hindsight
*For fresh-made,
follow directions on a package of dried beans. First, add a tablespoon of oil in a large pot and saute a whole chopped onion and bell pepper for 5-10 minutes until soft. Add a tablespoon of garlic during the last minute of cooking. I like to cook veggies with a couple of bacon slices
(if you want to keep it vegetarian, leave it out).
Pour in 8 cups of water and add the black beans.
Next add the sauteed veggies, including some bacon grease, to the pot.
Add
a teaspoon of sugar and 2 tablespoons of vinegar. Salt and pepper to taste, and finally, sprinkle in a teaspoon of dried or fresh oregano and a whole bay leaf.
For more flavor, you can substitute an equal amount of chicken or vegetable stock for a portion of the water when cooking beans. Low boil or simmer until beans are tender, about 3-4 hours. For shorter cooking time soak beans overnight before cooking - this will save you an hour of simmering. Check on beans every hour to make sure the liquid does not cook out. Add water or broth if needed.
During the last hour of cooking, I uncover the pot so liquid cooks down and thickens slightly. Check on the beans a few
times to make sure water doesn't totally cook out.
Crunchy radish, a tangy vinaigrette, and creamy avocado -- my
Cuban Salad makes a light beginning to typical meat and carb-heavy Cuban meal. This salad goes perfectly with a
Cuban Sandwich or
Cuban Roasted Pork.
It is a simple salad made with budget produce from
my local Latin market.
I got one bunch of radishes for about 33 cents, a tomato at 79 cent per pound, a large avocado for 69 cents, and a yellow onion at 33 cents per pound. With these prices, I look forward to standing in the grocery
checkout line again soon!
In my experience with Cuban cuisine, the salads always start with avocado, tomato, and sliced onion,
with a light refreshing vinaigrette. Sometimes a few greens are introduced - in my version, I left them out and added sliced radish.
All
it takes is a minimal amount of chopping - and a quickly whisked olive oil and vinegar salad dressing to finish. My light and crunchy
Cuban Salad is a fine accompaniment to any lunch or dinner entree, Cuban or not.
Ingredients (single serving)
- 1 tomato - sliced or cubed
- A few thin slices of onion - amount depends on your taste.
- 1 avocado - sliced or cubed
- 4 whole radishes - sliced
Vinaigrette
- 2 tablespoons of vinegar - white, but any will do. You can also use lime or lemon juice instead.
- 2 tablespoons of olive oil
- Salt and pepper to taste
Directions
Assemble
sliced or chopped veggies in a serving bowl or plate. In another bowl,
whisk together olive oil, vinegar, salt, and pepper for a couple of minutes, until well blended. Pour salad dressing over
Cuban Salad. Serve cool or at room temperature.


 What's interesting about them is when added to a tasty fluid they swell, absorbing the liquid, becoming similar to a tapioca pudding after setting for about 4 hours. The taste of Chia is fairly neutral, maybe with a slight green tea flavor, so using a rich tasting liquid like almond or soy milk is recommended.