Monday, September 26, 2011

Sauteed Chicken and Chorizo

If you are going to steal, steal from the best. I first heard about soft Mexican Chorizo being used as a marinade from pop-up chef Ludo Lefebvre at LudoBites 6.0. I have not had the pleasure to reserve a seat to try out his unique flavors (LudoBites usually books-up in minutes for the short month, or two, long run.) But, I do like to read all about his clever and tasty sounding dishes - you can click here to see what I am talking about.

 One entree that did catch my attention is his Chorizo Half Chicken. What a cool idea: just marinate chicken in creamy, spicy Mexican Chorizo. He cooks the dish sous-vide. Which means sealing the chicken and chorizo in a plastic bag and slow cooking it for hours. If you want to give sous-vide a try, our local newspaper, The Los Angeles Times, shows you how to do it simply at home -- click here for a video and print instructions. Since I've never eaten at a LudoBites, this recipe is delectable guesswork.


This French Top Chef contender is a fan of incorporating local California flavors into his European cooking repertoire. And when he does a pop-up restaurant in L.A., that means using California farmers market produce, and Mexican ingredients, too.


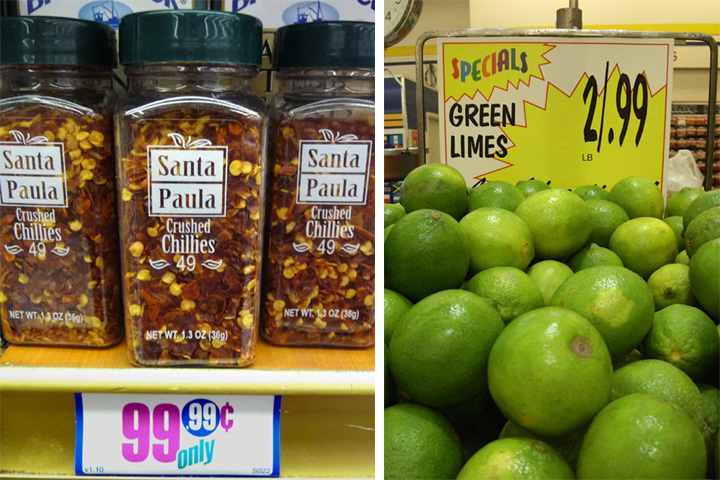
Chicken is the cheapest protein and I get it at my local Latin market for way below 99 cents per pound -- actually, 59 cents per pound for a 10 pound bag! The bag holds leg quarters, but I'm fine with that. I've also bought bone-in white meat breast for 99 cents per pound, on sale at regular grocery stores. White meat is easy to overcook and dry out, so I prefer the cheaper cuts.


Mexican Chorizo is made with Pork, Beef, and recently, Soy. I used a Beef Chorizo for this recipe. Last week I reviewed a vegetarian Soy Chorizo and gave it a top score of 9 -- I'm sure it would work as well. Mexican Chorizo is like a paste, so you just heat it up and smear it on. Then all you do is cover the pan and cook until done -- it couldn't be simpler. The end result is spicy and mucho delicioso.

 I am a fan of  Mexican Chorizo, and have used it in several recipes (click on name for recipe link): Chorizo and Eggs, Mexi-Turkey Burger, Stuffed Bell Peppers, and now, Sauteed Chicken and Chorizo.


Ingredients (1 serving)
  • 2 chicken pieces - I used a thigh and leg.
  • 2 tablespoons of Mexican Chorizo. Don't use hard Spanish Chorizo for this recipe.
  • Salt and pepper to taste

Directions
Mexican Chorizo is soft like pate, and stored in a plastic casing. I use one heaping tablespoon per chicken piece. While a saute pan is coming up to low/medium heat, put chorizo in a bowl and microwave for about 10-15 seconds -- until chorizo is soft and oil is starting to separate.


If you are using leg quarters, you can separate the leg from thigh -- I've also made the dish with whole leg quarters. Coat chicken with lightly heated chorizo, on all sides. If you do not have a micowave, just add chorizo to saute pan and heat until it's soft (then add chicken and coat both sides.)


Add chorizo coated chicken to saute pan. Cover pan and reduce heat to low/medium. You want to slowly cook chicken covered, for about 10 - 15 minutes, each side. Done when chicken juices run clear -- just slice into it to make sure there is no red or pink color at the bone.


Chorizo will turn dark brown and be clumpy like brown sugar, when done. Plate chicken and scoop on crumbly cooked chorizo. An excellent accompaniment is my Mexican Rice and Charro Beans recipes (click on names.)

Wednesday, September 21, 2011

Deal of the Day - Mexican Soy Chorizo

It's really good! I just noticed this Soy Chorizo one day at the 99c only Store in Hollywood. I did a double take and thought, "why not try it?" When I first spied it next to the Beef and Pork Chorizo, I read "Soy" as the Mexican word for "I am," as in "Soy Mexican" (I'm Mexican), not "Soy" as in vegetarian.

For 99.99 cents, it 's the right price for this Chintz Chef, so I thought this would make an interesting Deal of the Day. I was not disappointed.


Normally Mexican style chorizo is soft like raw ground meat. This Soy Chorizo, by Cacique, is similar, but with a cooked ground beef crumbly texture, too.

Spice-wise you would be hard pressed to tell the difference to regular chorizo - it's still chile flavored and spicy hot. Since there is no meat, or fat, you may want to add a splash of oil if you are using a regular pan.

I guess what I miss the most is the grease that is rendered when a meat chorizo is browned -- it's so pungent and very flavorful. But, for calorie watchers, this is a great alternative.

The ingredient list is short, unlike real chorizo that has a long list of organ meats. Read the package to see for yourself, or go to Cacique's website here.


The best way to try out a new food product, I've found, is to use it in an egg scramble. This also works well if you don't know a spice and want to try it out in a recipe, cheaply and quickly.

The Soy Chorizo squeezes out of the plastic skin easily. I used about a third of the 8 ounces, and added a tablespoon of oil, as soy chorizo sticks to the pan, unlike meat chorizo which has some fat and greasy bits in the mixture.

This Soy Chorizo is already cooked, so you just need to heat it through to bring out the flavors in the chile and spice paste. After about three minutes of stirring, I added two eggs to scramble.


The chorizo flavors mix well with scrambled eggs -- savory and spicy. It's a light breakfast, and a tasty change of pace. You would not eat it by itself from the package, but you could add Cacique Soy Chorizo to many dishes as a flavoring. I have several Mexican Chorizo dishes I've already made, just click on a name to see my recipe: Chorizo & Eggs Breakfast Tacos, Stuffed Bell Peppers, Mexi/Turkey Burger and Seafood Paella.

So on a scale of 1 to 9, nine being best, I give this Deal of the Day, Cacique Soy Chorizo, a tasty 9! I will definitely be using this product again -- especially as a light, spicy, breakfast taco start to my day. And check back next week for another Mexican Chorizo recipe: Sauteed Chicken and Chorizo.

Friday, September 16, 2011

Beanie Weenies! - VIDEO

Don't tell my wife about this blog post, she would not like anyone to know of her guiltiest culinary pleasure! It was her that turned me on to this delectable dish. I'm really scraping the bottom of the can here -- so, let's keep this Beanie Weenie recipe between you and me.


I can imagine Amy in her bachelorette days, with another magazine article deadline looming, and no time to hit the market to select fresh veggies for a nutritious salad -- and as a last resort, rummaging through the cupboard for a can of baked beans. Then sighing in relief, when she finds a few wieners left in a package of hot dogs, in the back of the refrigerator. Deadlines call for desperate measures.

Don't look down your noses, now -- hey, I've tried it and it's freaking good! This is cupboard cuisine at its cheapest and quickest. A similar recipe brought from England (beans with bacon) kept the early Colonialists fed through bitterly cold winters. New Englanders soon started adding maple sugar, or molasses, to create the classic Boston Baked Beans used in this recipe (read all about the origins here.) So, you will be honoring our Colonial ancestors by trying The Chintzy Chef's last budget entree!

Back when my wife introduced me to her secret cravings, hot dogs were a traditional mix of pork and beef.  Now you can get "natural," kosher, or nitrate and hormone-free wieners. You can kick this recipe up a notch by substituting fresh ground, and encased, sausages from your local deli or specialty market.


As for canned baked beans, your selection is somewhat limited. I've found Bush's Baked Beans a good brand, while the British swear by Heinz (funny video of two English blokes fixing them on toast for breakfast here.) If you have a favorite, use it. For this recipe, in keeping with my blog theme, I used an off-brand bought cheaply at my local 99c Only Store. Homemade Boston Baked Beans are on my to-do list, I'm just waiting until it gets cold enough for this slow-baking oven recipe, so do check back for that.


Just watch the video below to see how fast a plate of sweetened legumes with frankfurters can disappear. The video takes you through the making and consuming of my Beanie Weenie recipe, using an animation technique called "stop motion."

You've seen it before, popularized through the Gumby and Pokey TV show for children, or my favorite claymation movies featuring Wallace and Gromit. In the original 1933 King Kong movie, the giant ape was really just a foot-high model.

Click on the following animators to view visually baroque uses of stop motion from international film festival favorites the Quay Brothers and Jan Svankmajer. And, the most outrageous use of stop motion is in my "Chasing Sea Urchin" video, where I duke it out with a live sea urchin on an air hockey table! Click here to see it -- stop motion starts at 2 minutes and 20 seconds.

So, if you are under the gun and need a quick protein and carb-loaded boost, you could do worse than my wife's Beanie Weenies recipe.  Do you have a quick and cheap guilty pleasure? Leave a comment describing it, so I don't feel so bad divulging a culinary couple's dark secret!

  Beanie Weenies! - Video

Play it here. The video runs 58 seconds. 

To view or embed from YouTube, click here.
Ingredients (2 servings)
  • 2 - 4 hotdog wieners - or your favorite sausages.
  • 1 can of Baked Beans or Pork n' Beans - I used a 27-ounce can but you can use a smaller one.
  • A teaspoon of oil for frying wieners
  • Beans & Wienies have plenty of salt to my taste, but add a bit of black pepper to taste.

Directions
Pour beans into a pot to heat through. 

Add oil to medium heated saute pan. Split hot dogs and cook in pan until browned on each side, about 3 - 5 minutes.

Serve beans on a plate and top with sauteed hot dog. The drink of choice with this entree is a mug of beer!

Sunday, September 11, 2011

Roasted Creamed Corn

Lusciously creamy and sweet, made with caramelized onion and roasted corn, the latest 99 Cent Chef creation will have you coming back for seconds. This dish is basically homemade creamed corn, but much better-tasting than canned. And you won't get that metallic aftertaste.

When roasting corn for a summer patio BBQ, I like to peel back some of the corn husk and drizzle olive oil on the kernels, season with salt and pepper (or Cajun spices), then close up the ear and roast it on the gas grill until done. The husk and corn silk keeps it from drying out, but you still get the smoky grilled flavoring.

But for my Roasted Cream Corn recipe, I want a little more caramelization and color. So, first, I peel and boil the corn for 20 minutes, then move it to the grill and toast it on all sides. It's less messy this way -- no smoking husks, and the corn silk doesn't get into everything. And here's a great video link on how to peel corn.

I finish up the dish adding caramelized onion, garlic, cream and cheese. It's rich, but you could lighten it up with 2% milk and a low fat cheese. For vegetarian version use soy, almond or favorite dairy substitute.


 I can always find whole ears of corn for less than a dollar at my neighborhood chain grocery store, or my local Latin market.  Seasonal fresh corn is also cheaply found in farmers markets and roadside vegetable stands. Depending on the cob size, when you shave off the kernels, a single cob can be the equivalent of a regular size can of corn. It's just as cheap, but fresh and better tasting.
  
Ingredients (2 servings)
  • 1 large ear of fresh corn - or 2 small ears, peeled and cleaned.
  • 1/2 cup of cream or half and half - okay to use whole or low fat milk. Vegan version use soy, almond or fave diary milk.
  • A slice of your favorite cheese - Mozzarella, Swiss, American, or cheddar. I used a Mexican Queso Fresco. Cheese is optional.
  • 1/2 small onion - white or yellow, chopped.
  • 1 tsp. garlic - fresh or from jar, chopped
  • 1 tsp. oil for frying onion.
  • Salt and pepper to taste
  • 3 cups of water for boiling corn.

Directions
Bring water to boil in a small to medium pot. Break, or cut, corn in half. Add to boiling water. Bring up to low simmer, and cook for about 20 minutes.


While the corn is simmering, add oil to a medium heated pan. Chop and add onion. Cook until lightly brown, about 5 - 7 minutes. Add garlic and cook for another minute, while stirring.

Turn off heat and set aside.

When corn is done boiling, remove to a tray. Now it's time to grill or roast the corn. If you have a stove top grill, you can use that - I used my gas BBQ grill. You could also broil corn in the oven. The main thing is to caramelize corn on at least four sides. Cooking time will vary with each roasting method. You want a nice medium brown on as much of each corn cob as possible.

For my gas grill method, I simply add the corn cobs and rotate them about every 5 minutes. Depending on how hot your grill is, it could be quicker. A medium brown is about right. Try not to burn it -- but hey, a little char is fine.

After all sides are roasted, it's time to finish it off in the pan with the caramelized onions and garlic.

First, remove corn from the cobs. I place the cut, or flat side, of the corn cob on a cutting board or plate. Take your knife and slice down where the kernel meets the cob. Sometimes I slice it perfectly, but then when I rotate the cob to make the next slice, I don't slice deep enough. Oh well -- you have a couple of cobs to get it right! It's better not to cut too deep - you don't want to introduce too much of the tough, mealy cob.


Keep rotating and slicing down the cob until all the corn kernels are removed. Add the roasted corn kernels to the pan of caramelized onion and garlic. Turn up heat to medium and add 1/2 cup of cream or milk. Bring to a simmer, then reduce heat to low. Salt and pepper to taste, while stirring. Cook about 5 minutes so corn absorbs some of the cream or milk. You want the final consistency similar to canned creamed corn -- or like a thick lumpy gravy.


Finally, add a slice of your favorite cheese. I used crumbled Mexican Queso Fresco. The final amount of cheese is up to you.


Stir until it melts. Serve it nice and warm.


It's easy to double the ingredient amounts, for more family members, or friends.

If you want to try this recipe while it's cold or rainy out, you could just go from boiling the corn right to sauteeing it. Hey, you can no longer call it Roasted Creamed Corn, but that's okay with me!

Tuesday, September 6, 2011

Squash Blossom Quesadilla

I've done a few quesadilla recipes before, but this may be the most tasty one yet! Just check out my exotic Cactus Quesadilla; or my wacky video of my neighbor, comedian Pedro Pe, cooking up his delicious Shrimp Quesadilla -- click on the dish name to see those recipes.


I first tried a Squash Blossom Quesadilla a couple years ago on the L.A.'s subway/light rail Gold Line's opening day celebration (video here.) My wife and I took it to Mariachi Plaza in Boyle Heights to a great hole-in-the-wall Taqueria.


I immediately was curious when I spied a Squash Blossom Quesadilla on the menu -- into which the owner added fresh blossoms harvested from her own backyard. And I was not disappointed -- the quesadilla oozed melting cheese. And the strands of soft wilted blossoms gave the quesadilla a delicate, and mild, squash veggie flavor. I was impressed.


So this spring, when my compost heap became overrun by free squash plants with plenty of blossoms -- it was only a matter of time before I got down to making my own Squash Blossom Quesadilla, and share the colorful recipe with you.


Ingredients (serves 1)
  • About 3 squash blossoms - depending on the size.
  • 2 slices of your favorite cheese - I used a crumbly Queso Fresco.
  • 1 flour or wheat tortilla


Directions
On a grill or pan, over a medium head,  add the tortilla. Add sliced or crumbled cheese and squash blossoms. If you are using sliced cheese put squash blossoms between 2 slices. Fold tortilla in half.


Cook one side until lightly browned or cheese is melting, about 4 minutes, depending on the heat. Turn over stuffed tortilla and lightly brown the other side, another couple of minutes.The plump squash blossoms will wilt and shrivel, but intensify in flavor.


Slice in half and serve with a favorite salsa. If you are serving them at a party, then you can slice into 3 or 4 bite-sized triangle pieces, and pass around a platter full!


Thursday, September 1, 2011

Spicy Mango

Sweet, hot and with a sensuous texture, is the way this culinary cheapskate likes it! Mangos are just too darn sweet sometimes, so this recipe is a great change of pace. It is simple to do and you control the heat. All you do is sprinkle crushed red chile flakes over sliced mango, followed by a bath of fresh lime juice. It's a great flavor profile: sour, sweet and spicy.


It's a delicate balance, but you can add the red pepper flake and lime juice a little at a time, until you get it right. Ripe sweet  mango can take the sour heat.


My local Latin market always has mangos on sale. You may have to stalk your regular grocery store until  they reduce prices, but my latest sweet side dish is worth the wait. This tasty treat is another reason for you to get familiar with local ethnic markets. Mine stocks every type, from huge Mexican mangos to small Manila mangos, both way cheap.


I was pleasantly surprised when I first tried Spicy Mango -- the addition of crushed red pepper did not overpower everything -- it pairs perfectly with honeyed mango. I've also included a photo-tutorial on how to peel a mango -- it's the least messy way I've found.

In the waning days of summer, this 'mango salad' makes a great addition to the menu for a backyard Labor Day BBQ or patio gathering.

Ingredients (serves 2)
  • 1 large mango - or 2 small ones.
  • 1 teaspoon crushed red pepper flakes - you may want to add half the amount and taste for heat.
  • 1 tablespoon of lime juice - fresh or from a bottle. Okay to use lemon juice.

*Spicy substitution: a whole chopped jalapeno (remove seeds) - of course, add a little at a time to suit your heat tolerance.

Directions

Peel ripe mango(s). They should be yellow (some are flecked and airbrushed with red and green), and soft but not mushy.


I like to peel half a mango at a time; it's less messy.  Cut just deep enough, through the skin, with four slices -- lengthwise, connecting cuts top to bottom.  Peel off half the skin (2 slices) on one of the wide sides (the seed is thin and flat like an oval hubcap.) Sometimes the skin will break, so peel until skin of one half side is removed.


Now all you have to do is slice off the flesh to the seed. You can make large or small slices, or cut crosshatches to make cubes.


Next peel the skin off  half of the other side (one quarter) of the mango. Slice or cube-cut the flesh. Finally, peel the last quarter and cut the remaining flesh. You may be able to work more fruit off the seed at this point. You can cut the mango into uniform bites or leave it roughly cut.


In a bowl or plate, arrange cut fruit and sprinkle on red pepper flakes. Be sure to distribute evenly, so you don't get extra hot spots. Adjust amount to suit your taste. Finally drizzle on a tablespoon of lime juice. You can serve this salad cold or at room temperature.
Related Posts Plugin for WordPress, Blogger...