Wake up and smell the coffee, it's National Coffee Day on September 29. Google this day and see what specials your local coffee houses are offering.
At my first job out of high school I drank my coffee black. Now I like milk and real sugar in my morning coffee.
I used to drink coffee at night when first I moved to Los Angeles, mainly to stay awake during my night classes in film and television, after my 9 to 5 job. Now I don't drink it at night as it interferes with my beauty sleep.
When I first lived on my own I drank freeze-dried coffee from a jar, but now I go for ground coffee in a vacuum-sealed can from Ralph's grocery store. Sometimes I spring for fresh ground from beans carried at our local Trader Joe's grocery market.
One of my favorite song lyrics is from Carly Simons's top 40 hit "You're so Vain" and it goes: "I had some dreams, they were clouds in my coffee..."
And this Budget Barista likes coffee as much today as ever, especially when a free donut is offered on this auspicious day byKrispy Kreme Doughnuts. And they are introducing a coffee glazed donut. and donut flavored coffee -- too much of a good thing is right up my alley.
I like their plain glazed donuts the best. Other donut stores carry fancier ones and extravagant ones, but for the price, Krispy Kreme is my go-to donut.
Orchid Donut by DK's Donutsin Santa Monica, California.
So on National Coffee Day, whether it's cloudy or sunny, and get a steaming cup, however you like it!
Click on above image to play my coffee for breakfast video.
My fave late night snack is a fresh toasted thick slice of Marble Rye Bread and a smear of real unsalted butter. Hey, I'll eat this almost any time of day, when a small pang of hunger hits.
I've been getting it lately in the discount bin at my local Ralph's grocery store. Every week or so I pick up a big container of plain yogurt and a can of coffee and always make sure to see if the Marble Rye is in the bread discount bin.
.It is a large round loaf that's discounted for less than two dollars -- a great deal even this cheap$kate cannot pass up.
click on any photo to see larger
I've eaten manyPastrami Sandwicheshere in L.A. and always order them on rye bread. The extreme pungent rye goes great with rich and smokey Jewish deli thick-sliced pastrami.
A close second sandwich is aCorned Beef on Rye. One of the oldest Jewish deli's had an anniversary celebration and was practically giving away the sandwiches and you can see the video I made about it right here:
Click on image to play video.
You can get all the tasty text and yummy photos for my Corned Beef andHomemade Pastramirecipes by clicking on the names.
There is nothing wrong with day old fresh baked bread, especially if you toast it -- that's the way I do it.
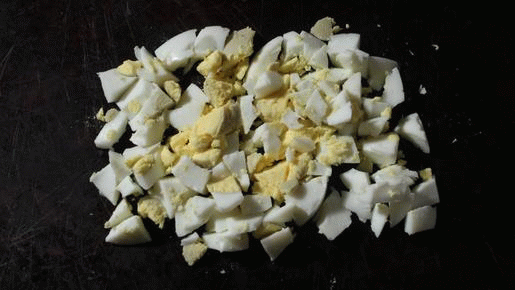
I'm called "The Tuna Mouse" at home because of how quickly a Loaded Tuna Salad just seems to vanish!
The extra briny olives give color and the salty taste goes well with sweet bread and butter pickles. Mixed into canned tuna, for a rich flavor, are chopped eggs and mayo.
It's one delicious concoction that fits snuggly into pita bread or bread roll, fills a pitted half slice of ripe avocado, or scooped on a green salad. I find all the ingredients easily at 99c only Stores and the Dollar Tree!
Click on any photo to see larger.
The addition of green olives makes this Loaded Tuna Salad extra unique. It's quite easy to find them at my local 99c only Store and Dollar Tree markets. You can use the plain type or ones with pimentoes.
Eggs are still cheap these days, I get an eight-count container at my local Dollar Tree. I use one whole-boiled egg, chopped. This ingredient is optional and okay to leave out.
You can use a little chopped pickle, or just go with pickle relish, which I always have a half-used jar left over from hot dogs, way back on a refrigerator shelf.
I also add finely chopped onion to my Loaded Tuna Salad but leave it out if you don't care for the taste of raw onion.
Mustard and Mayo are cheap if you have a Dollar Tree or 99c only Store in the 'hood. Hey, even Grey Poupon shows up on my 99c only Store shelves every once in a while. Okay to use any favorite mayo, including Miracle Whip or vegan mayo.
The main ingredient, canned tuna, is a cheap$kate staple in my kitchen pantry. I usually get "Chunk Light" tuna in water. I use two small cans for this recipe. "Solid" canned tuna is more expensive because it is a solid hunk of tuna and almost twice as much the amount as "Chunk."
Make sure not to mistakenly get tuna in oil, unless you like it that way. Also, drain the tuna of water, so Tuna Salad doesn't get all soggy and mushy.
The basic recipe is good for other canned fish like salmon, or chicken, too. So get out the can opener and twist off a few condiment jar lids and mix up my tasty and Loaded Tuna Salad.
Loaded Tuna Salad - VIDEO
Play here, video runs 1 minute 36 seconds
My YouTube video link for viewing or embedding, just click here.
Ingredients
1 can of solid Tuna in Water - about 6 ounces drained, or 2 cans of "chunk" tuna, drained.
1 boiled Egg - peeled and chopped.
1 tablespoon finely chopped Onion.
1 tablespoon Green Olives chopped or sliced - with or without pimento.
1 tablespoon Sweet Pickle Relish - okay to use chopped pickle.
3 tablespoons Mayonnaise - add more or less to your taste.
1 teaspoon regular Yellow Mustard or Dijon Mustard
Salt and Pepper to taste - I find canned tuna salty enough, so I usually leave out the salt.
Directions
Boil an egg for 10 minutes. Set aside to cool then peel it.
Fine-chop onion. Roughly chop green olives and a pickle (if you don't have pickle relish.
To a bowl add drained tuna, along with peeled and chopped boiled egg, chopped pickle (relish,) green olives, and onion.
Add one tablespoon of mayo at a time to reach the desired creaminess. Mix all the ingredients and taste.
I like a little black pepper to season my Loaded Tuna Salad. I find there is enough salt in canned tuna.
Serve in a pita or regular bread. Delicious as an appetizer with crackers or add a scoop to an avocado half, or fave salad.
How about a Loaded Tuna Melt? Just add a slice of cheese to the Tuna Sandwich, and brown it with melted butter in a stovetop pan, just like you would a regular Grilled Cheese Sandwich.
It's okay to leave out some Loaded Tuna Salad ingredients. The main ones are tuna, mayo, black pepper, and pickle relish.
Veggies wrapped in creamy scrambled eggs are a great way to start the day. And adding your fave cheese is over-the-top decadence. A Spinach and Cheese Omelet is one of my favorite breakfasts. Go ahead and dig in below.
Play it here. Video runs 1 minute 39 seconds.
It comes together quickly, as fresh spinach sauteed in a hot pan only takes a minute to become tender.
Click on any photo to see larger.
You can use thawed frozen spinach or spinach from a can, too. Just make sure to drain any packaged or canned cooked spinach, or the omelet will be too soggy.
Any cheese you have on hand can go into this omelet. I used a mild soft white French cheese, but go ahead and fill the omelet with good old American cheese, or even pungent Swiss or feta cheese.
For the eggs, I like to scramble them first in a bowl, then pour them into a low to medium-hot pan. Not too hot because I want to catch the eggs while they are slightly moist before I fold the omelet over the sauteed spinach and cheese.
Of course, cook the omelet the way you like it; old-school truckstop or diner-style with a slight crusty brown on the outside and solid on the inside. It's all deliciously good!
I went all out and topped the omelet with a pat of butter, and chopped chives from my small garden.
All the ingredients are the right price for this penny-pinching egg-flipper. Lately, I get an eight-pack of eggs from my local Dollar Tree and fresh spinach from the 99c only Store. I get cheese from both budget stores.
This is an omelet filled with greens made quickly while the coffee is still percolating. So go ahead and start the day with this cheap$kate breakfast, a 99 Cent Chef Spinach and Cheese Omelet.
Ingredients (one large omelet)
3 eggs - okay to make it a 2 egg omelet. I used medium size eggs.
Spinach leaves - about a handful or a packed cup. Okay to use frozen or canned spinach, just make sure to drain the spinach or your omelet will be very soggy.
Cheese - about a slice, but add as much or as little as you like. Okay to use any favorite cheese, like mozzarella, Swiss, Jack, string, cheddar, or plain American.
Butter - about 1 teaspoon. Okay to use a favorite cooking oil.
Salt and pepper to taste. I find that cheese is salty enough for me, so I just sprinkle on some pepper.
I finished the omelet with some fresh chopped chives - optional.
Directions
Prepare cheese if necessary. Slice or crumble cheese.
I just saute and stir spinach leaves in a medium-hot pan until tender. The leaves will collapse and moisten. As soon as the spinach is soft remove it from the pan. Wipe the pan clean if necessary.
Add 2 to 3 eggs to a bowl, I made mine with 3 medium-sized eggs. Whisk eggs to blend well.
Over medium heat, add a teaspoon of butter or fave oil to the omelet pan. Spread oil or butter over the bottom of the pan.
Pour in beaten eggs into medium/hot pan. Lightly scramble eggs. Let the omelet cook until eggs are starting to firm up, but still wet. It takes a minute or two, depending on the heat of the pan and how many eggs you use.
Spread out eggs to cover the bottom of the omelet pan as eggs firm up.
Add cheese first so it will melt quicker and lay on the cooked (and, if necessary, drained) spinach.
Gently roll the omelet to cover the cheese and spinach. If you are cooking old school, just fold it in half. Cook the omelet to the desired doneness, about another 30 seconds to a minute. It's up to you how well done the omelet turns out.
Just slice into the thickest part of the omelet to check for preferred doneness. Of course, you can cook the omelet any way you like. A hot omelet will continue to cook until eaten.
I finish the Spinach & Cheese Omelet with a little black pepper, a pat of butter, and fresh sliced green chives (optional.)
It's okay to use your fave omelet cooking technique, like just letting the egg firm in the pan without scrambling. Add cheese and spinach when the egg is firm, then fold it in half. Click here to see my truckstop diner-style omelet.
My YouTube video link for viewing or embedding, just click here.
Mom is back and she cooks up one of her family classics for you, it's her Shrimp & Rice recipe. It's so good I had to make a video.
This Tex-Mex dish is the real thing, too. When I was a kid, we lived for a few years on the Gulf Coast in Port O'Connor, Texas with Mom's parents, Big Mama and Big Daddy. He was a shrimp boat captain, so you know there was always a freezer full of jumbo shrimp he would skim off the catch.
We had shrimp fried, grilled, and, of course, steamed in rice with tomato sauce. There was always a pot of pinto beans on the stovetop, so beans were mixed into the Shrimp & Rice and scooped up with warm flour tortillas homemade by Big Mama. Boy, was that a filling seafood meal. I look back on it now and realize how good we had it.
Well, I finally got around to getting Mom to make our family recipe of Shrimp & Rice for you - on camera this time.
Shrimp is quite expensive, so it's always a special occasion when Mom cooks Shrimp & Rice. And the grapevine starts simmering when it gets out Shrimp & Rice is on the menu, so expect a lot of drop-ins, like my niece Candyse.
Be sure to watch the video all the way through to check out all the freeloaders, I mean, close family -- including me, the biggest moocher of them all.
The recipe is easy to do, but there is one peculiar culinary twist, Mom learned to first saute the raw rice in oil. Toasting rice is a Mexican technique that will keep the rice from clumping and sticking together, and the rice kernels will split open when steamed. So the rice texture is different what you may be used to.
Mom doesn't saute the rice too long; just look for some of the rice grains to turn light brown, then add the wet ingredients and spices. You don't want all the rice to brown, or some will surely scorch, then you will have a slightly burnt undertaste.
The other main ingredient is a small 8-ounce cheap can of tomato sauce. Mom adds extra spice with ground cumin and creole seasoning. The Creole seasoning is a nod to her present home in Louisiana.
Click on any photo to see larger.
She also adds dried cilantro. But if you don't have cumin, cilantro or Creole seasonings then leave them out -- I'm sure they did not have those spices easily available to her mom, Big Mama, when she was growing up.
This recipe calls for a pound of peeled shrimp. Now the trick to cooking shrimp is not to overcook them. So she adds peeled shrimp during the last 10 minutes when the rice is almost done.
You know how expensive shrimp are these days, but sometimes they do come on sale for less than $5 per pound. I even get small bay shrimp at my local Dollar Tree and 99c only Stores. But because Mom has Gulf Coast shrimp connections for free shrimp, this video recipe is going all out!
If you are fortunate to find raw unpeeled jumbo shrimp then make sure to pay attention when Mom shows you how to peel and devein a jumbo shrimp. Large shrimp sometimes have a gritty black thin vein along the shrimp backbone side. It's easy enough to remove and Mom has all the moves down pat.
Cheaper tiny Bay shrimp don't have a gritty vein to worry about, and if you get peeled and packaged shrimp they are ready to cook.
Removing vein from jumbo shrimp.
Mom's Shrimp & Rice recipe uses more water for cooking the rice than normal. She adds an extra half cup of water at the end when she also adds the raw shrimp. She is going for a slightly soupy finish - kind of like a risotto. We always had the recipe with white rice, but okay to use brown rice.
When the extra water and raw shrimp are added you finish cooking it altogether another 10 minutes. Turn off the heat and let the rice and shrimp set for another 10 minutes so all the flavors come together.
While you are waiting, heat up pinto beans and a few flour tortillas -- that's the Tex-Mex way. Mom always has a couple of Ziploc bags of Homemade Pinto Beans in the freezer ready to be defrosted.
My recipe to make your own Pinto Beans is a click away, here. It's okay to use any fave canned pinto beans, too.
I gotta give it up to Mom who is so generous to share her family's famous Shrimp & Rice recipe. It's actually a simple recipe made with a whole lotta love and care, just what you expect from my Mom.
Mom's Shrimp & Rice - VIDEO Play it here, video runs 8 minutes 51 seconds.
My YouTube video link for viewing or embedding, just click here.
Ingredients (about 4-6 servings with pinto beans)
1 pound Peeled Shrimp - Mom uses jumbo shrimp, but it's okay to use any size shrimp you find on sale.
1 cup of Rice - white or brown rice
2 tablespoons Olive Oil - okay to use regular vegetable oil. Oil is for browning the rice.
1/2 Onion - chopped
2 cloves Garlic - chopped
1/2 Green Bell Pepper- chopped
1 whole Green Onion - chopped
2 cups Water - to steam rice.
8-ounce can Tomato Sauce - to flavor rice.
1 teaspoon Ground Cumin
1 teaspoon Dried Cilantro - optional. Okay to use fresh cilantro.
Salt and Pepper to taste - leave out salt if using Creole Seasoning.
Creole Seasoning to taste - optional.
Add 2 tablespoons of oil to a pot over low/medium heat. Pour in one cup of rice. You want to stir the rice to coat all the grains in oil, so it all cooks evenly.
Stir and saute the rice for about 10 minutes (depending on the heat.) What you want is for some of the rice grains to be lightly toasted and brown. It is better to under-brown than burn the rice.
Stir the rice as it browns, so it doesn't burn. When the rice is toasted add the chopped onion, garlic, bell pepper, and green onion.
Saute the veggies and rice for about 5 minutes, to soften the veggies.
Pour in the water and a small 8-ounce can of tomato sauce.
Now add the spices. One teaspoon of ground cumin and dried cilantro (these spices are optional.)
Season with salt and pepper to taste. Since Mom lives in Louisiana she has to add a few big shakes of Tony Chachere's Creole Seasoning (again, optional.)
Mix all the ingredients well. Turn up the heat to high and bring the rice and liquid up to a boil. As soon as it starts to boil, reduce heat to low and cover the pot of rice. You want to cook the rice at a low simmer for 20 minutes.
While the rice cooks, you prepare the shrimp if necessary. You can use prepared packaged shrimp that are already peeled and deveined.
Small Bay shrimp are usually ready to cook, and sometimes even pre-cooked. If you use precooked shrimp then you add them at the very end of this recipe. All you want to do with precooked shrimp is heat them up for no more than 5 minutes total.
Because the jumbo shrimp are so large she slices each shrimp into bite sizes. For small shrimp, you can leave them whole, or just slice them once or twice to make them bite-sized.
Once the rice has cooked for 20 minutes uncover and add half a cup more of water. Add the peeled and sliced shrimp to the rice.
Adding extra water during the final cooking phase will give Shrimp & Rice a risotto-like dampness.
Bring rice and water to a boil, reduce heat to low. Cover and cook for another 10 minutes.
After 10 minutes turn off the heat and let it all just set for a final ten minutes, so all the ingredients blend and flavor the Shrimp & Rice.
You can serve it with flour tortillas and pinto beans - that's the way we do it, Tex-Mex style.
How to Peel Shrimp
If you are working with unpeeled shrimp it is not hard to clean them. Mom uses headless shrimp with the shell on. What you do is peel a couple of shell segments on where the shrimp head was. Once a couple of shell segments are removed you can pinch the tail and pull off the segments that are left, along with the tail.
Peel off shrimp shell
Sometimes the shrimp tail breaks off, so you will have to peel each and every shrimp shell segment. As with any task, practice makes perfect, so the more you do it the better you get. Again you can use peeled shrimp that are ready to cook. You might want to go the prepared route if you have never peeled raw shrimp before.
Large and jumbo shrimp may have a gritty dark "vein" along the backside of a peeled shrimp. Just slice into the back of a shrimp and remove it. Watch the GIF below to see how Mom does it. Some shrimp have the vein and some don't -- kind of depends on how large the shrimp are. Small bay shrimp don't have "veins" large enough to notice.